Purpose: Set up Adobe Document Services in ABAP and JAVA AS (non-dual stack).
Installation/Activity steps :
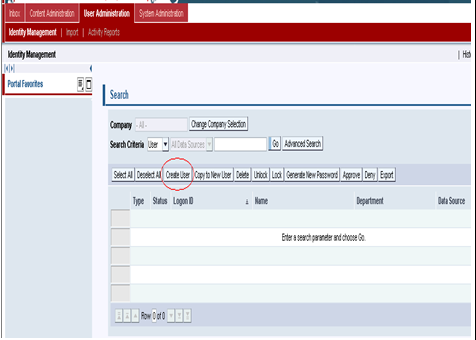
1) Create user ADSUSER in JAVA AS in either Visual Administrator or IRJ Portal, if it does not exist already. Usually this user will be created during the installation of JAVA AS system as of release NW 7.0
Visual Admin: server<x> –> services –>Security Provider.
IRJ Portal: http://<fully qualified name>:5<XX>00/irj/portal
2) Security Policy must be TECHNICAL USER as shown in the screenshot.

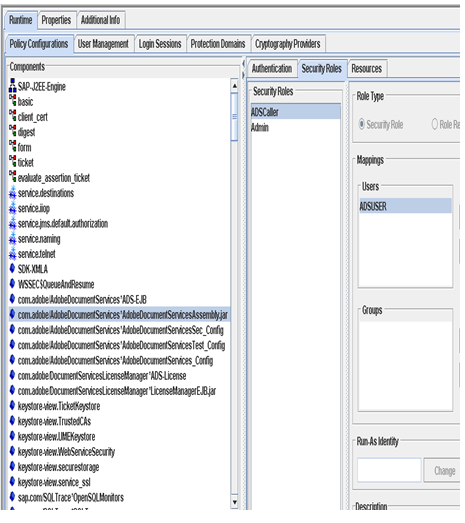
3) Assign security role in Java Stack.
a. Go to Visual Admin
b. On the Cluster tab, choose Server <x> → Services → Security Provider.
c. On the User Management tab, choose the Tree tab in the left panel.
d. In the User Tree, ensure that the user you created in ABAP appears under the ADSCALLERS group.
e. On the Policy Configurations tab, in the Components area, select com.adobe/AdobeDocumentServices*AdobeDocumentServicesAssembly.jar.
f. On the Security Roles tab, select ADSCALLER from the Security Roles list.
g. In the Mappings area, choose Add, which is assigned to Users. A dialog Choose Users or Groups is displayed.
h. Choose the Tree tab.
i. In the User Tree, under the ADSCALLERS group, select the ADSUSER you just created and choose OK. This assigns the new user to the ADSCALLERS security role.
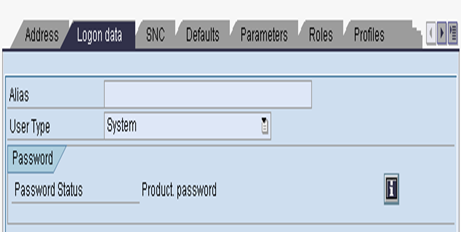
4) Create Service User ADS_AGENT in ABAP (SU01):
a. User type must be “System”
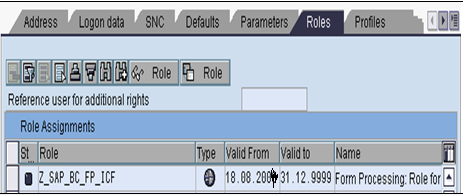
b. Assign the role SAP_BC_FPADS_ICF and SAP_BC_FP_ICF or the equivalent customizing roles
5) Create ABAP RFC Connection (SM59
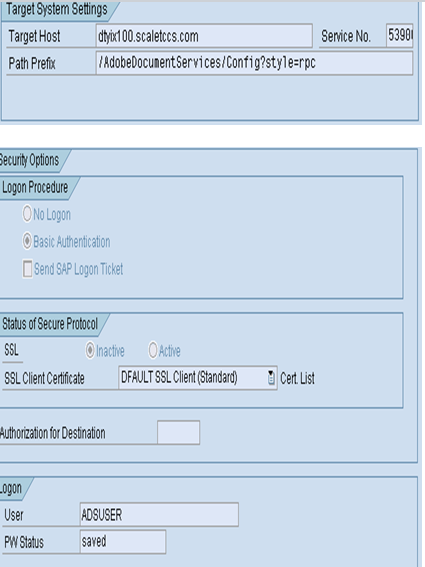
a. Go to SM59 and create destination called ADS under “HTTP Connections to External Server” and connection type “G”.
b. Provide Target Host in “Technical Settings” tab. If you are configuring in dual stack (ABAP & JAVA) system like CRM, target host must be the ABAP host name and specify the Service No. (5<XX>00).
Note: Patch Prefix must be /AdobeDocumentServices/Config?style=rpc
a. Go to “Logon & Security” tab; choose ‘Basic Authentication’ under Logon Procedure. In Logon security Tab, enter ADSUSER and its password
b. Other fields can be left as defaults.
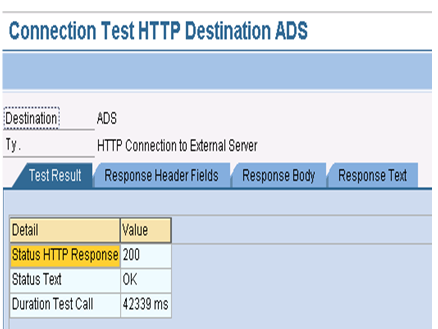
c. SAVE and Test the connection.
6) Activate ICF Services
a. Log on to your SAP Web AS ABAP system
b. Choose transaction SICF
c. Choose default_host → sap → bc → fp in the tree
4. Choose Service/Virt.Host → Activate
Note: If AS ABAP and AS Java (with ADS) are installed in different systems, and you want to bundle your forms to improve performance, you also have to activate the fpads ICF service.
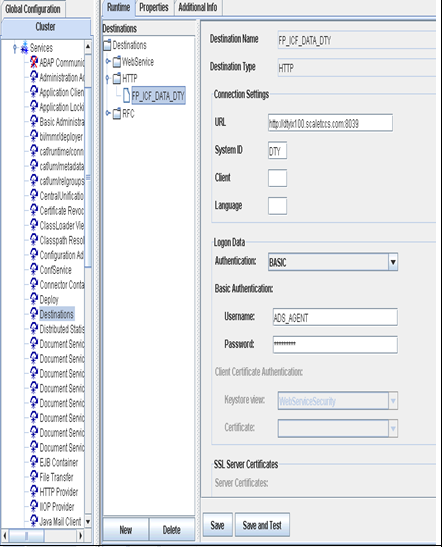
7) Create following Destination Service FP_ICF_DATA_<SID> (Visual Admin)
a. Fill the fields URL (http://<hostname>:<HTTP_port>), System ID, Client (if required to be set to specific client), Authentication and user name & password of ADS_AGENT (which was created in ABAP stack) with respect to your target system.
Note: You can find HTTP port number from tcode SICF.
b. Click on tab Save and Test
Note: If you choose Save and Test, you can ignore the message Error during ping operation: Received HTTP response 404.
Set up Basic Authentication in JAVA Environment
- Log on to the Visual Administrator.
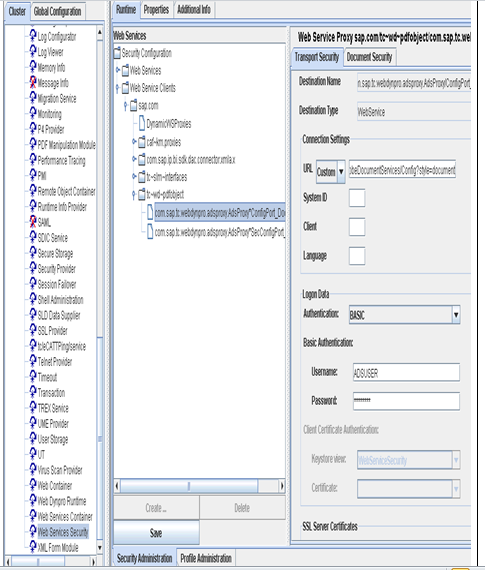
- On the Cluster tab, choose Server <x> → Services → Web Services Security.
- Choose Web Service Clients → sap.com > tc~wd~pdfobject →
com.sap.tc.webdynpro.adsproxy.AdsProxy*ConfigPort_Document.
- From the Authentication list, select BASIC.
- In the User and Password boxes, enter as Username ADSUSER and a Password.
- Choose Save.
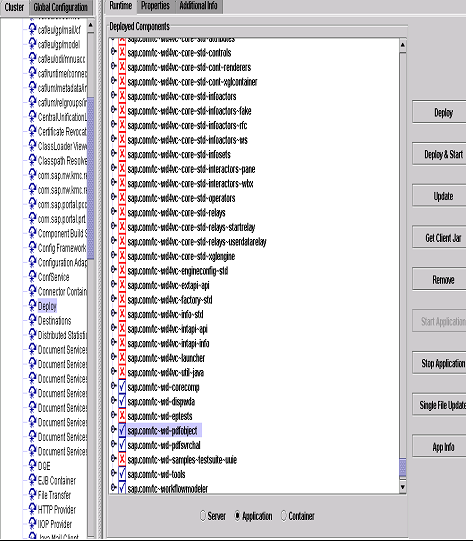
- The authentication data must be activated. For doing this navigate to Services → Deploy.
- Choose the button Application.
- Choose sap.com/tc~wd~pdfobject in the tree.
- Choose Start Application.
8) Set up Basic Authentication in JAVA Environment
a. Log on to the Visual Administrator.
b. On the Cluster tab, choose Server <x> → Services → Web Services Security.
c. Choose Web Service Clients → sap.com > tc~wd~pdfobject → com.sap.tc.webdynpro.adsproxy.AdsProxy*ConfigPort_Document.
d. From the Authentication list, select BASIC.
e. In the User and Password boxes, enter as Username ADSUSER and a Password
f. Choose Save
g. The authentication data must be activated. For doing this navigate to Services → Deploy.
h. Choose the button Application
i. Choose sap.com/tc~wd~pdfobject in the tree
j. Choose Start Application.
Post Installation Steps :
Execute the following reports via SE38/SA38 to verify ADS configuration.
a. FP_TEST_00
b. FP_PDF_TEST_00
c. FP_CHECK_DESTINATION_SERVICE
d. FP_CHECK_HTTP_DATA_TRANSFER
Result: You should be able to see the page in PDF format